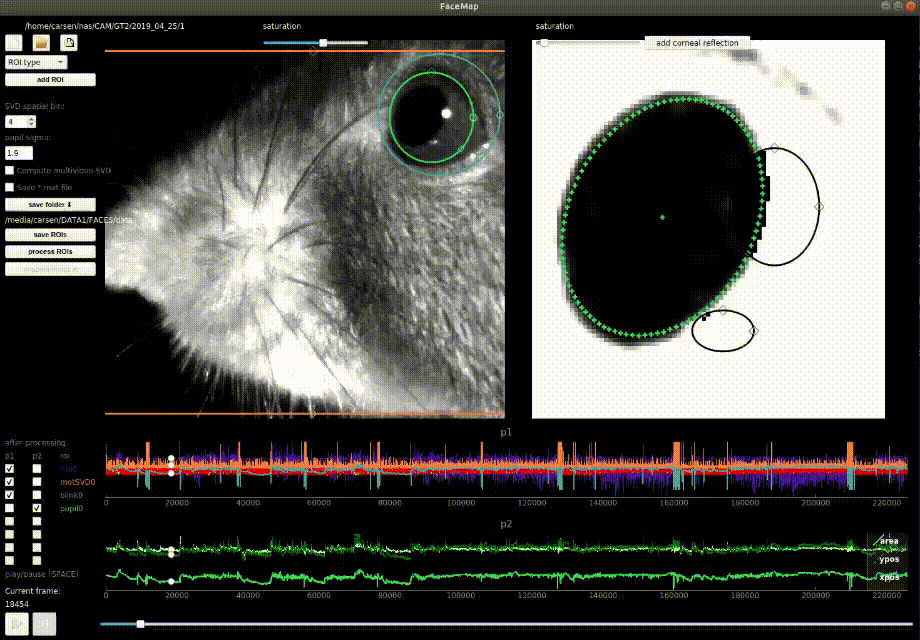
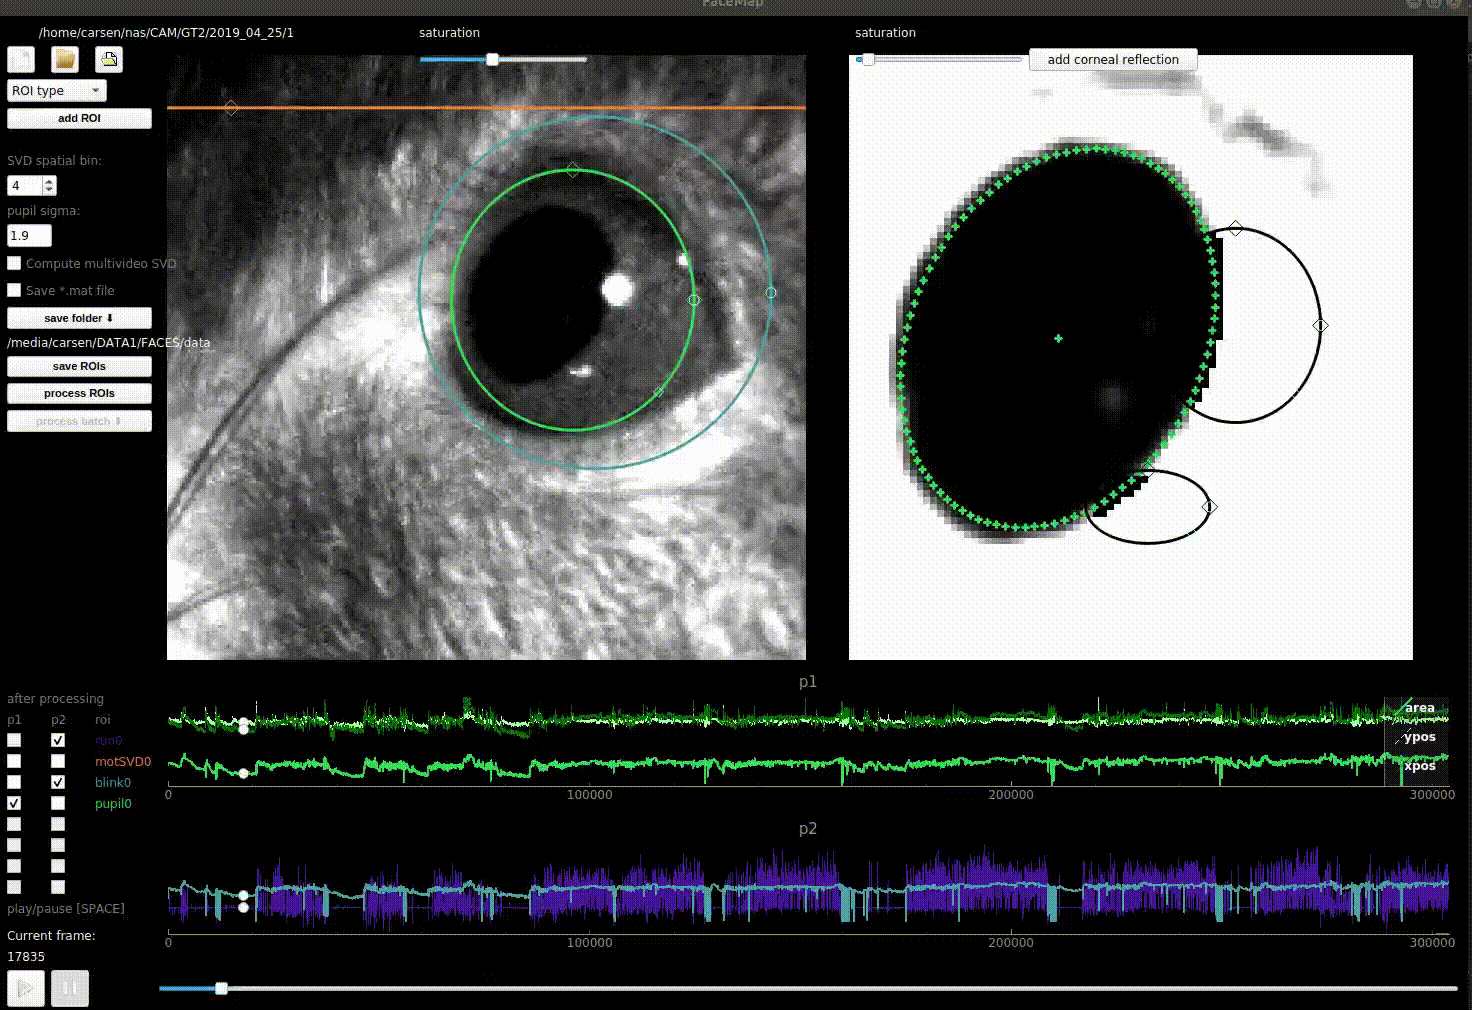
SVD processing and ROIs
Choose a type of ROI to add and then click “add ROI” to add it to the view. The pixels in the ROI will show up in the right window (with different processing depending on the ROI type - see below). You can move it and resize the ROI anytime. You can delete the ROI with “right-click” and selecting “remove”. You can change the saturation of the ROI with the upper right saturation bar. You can also just click on the ROI at any time to see what it looks like in the right view.
By default, the “multivideo” box is unchecked. If you check it, then the motion SVD or movie SVD is computed across ALL videos - all videos are concatenated at each timepoint, and the SVD of this matrix of ALL_PIXELS x timepoints is computed. If you have just one video acquired at a time, then it is the SVD of the full video.
To compute motion SVD and/or movie SVD, please check one or both boxes in the GUI before hitting process.
If you want to open the GUI with a movie file specified and/or save path specified, the following command will allow this: ~~~ python -m facemap –movie ‘/home/carsen/movie.avi’ –savedir ‘/media/carsen/SSD/’ ~~~ Note this will only work if you only have one file that you need to load (can’t have multiple in series / multiple views).
ROI types
Motion SVD
The motion/movie SVDs (small ROIs / multivideo) are computed on the movie downsampled in space by the spatial downsampling input box in the GUI (default 4 pixels). Note the saturation set in this window is NOT used for any processing.
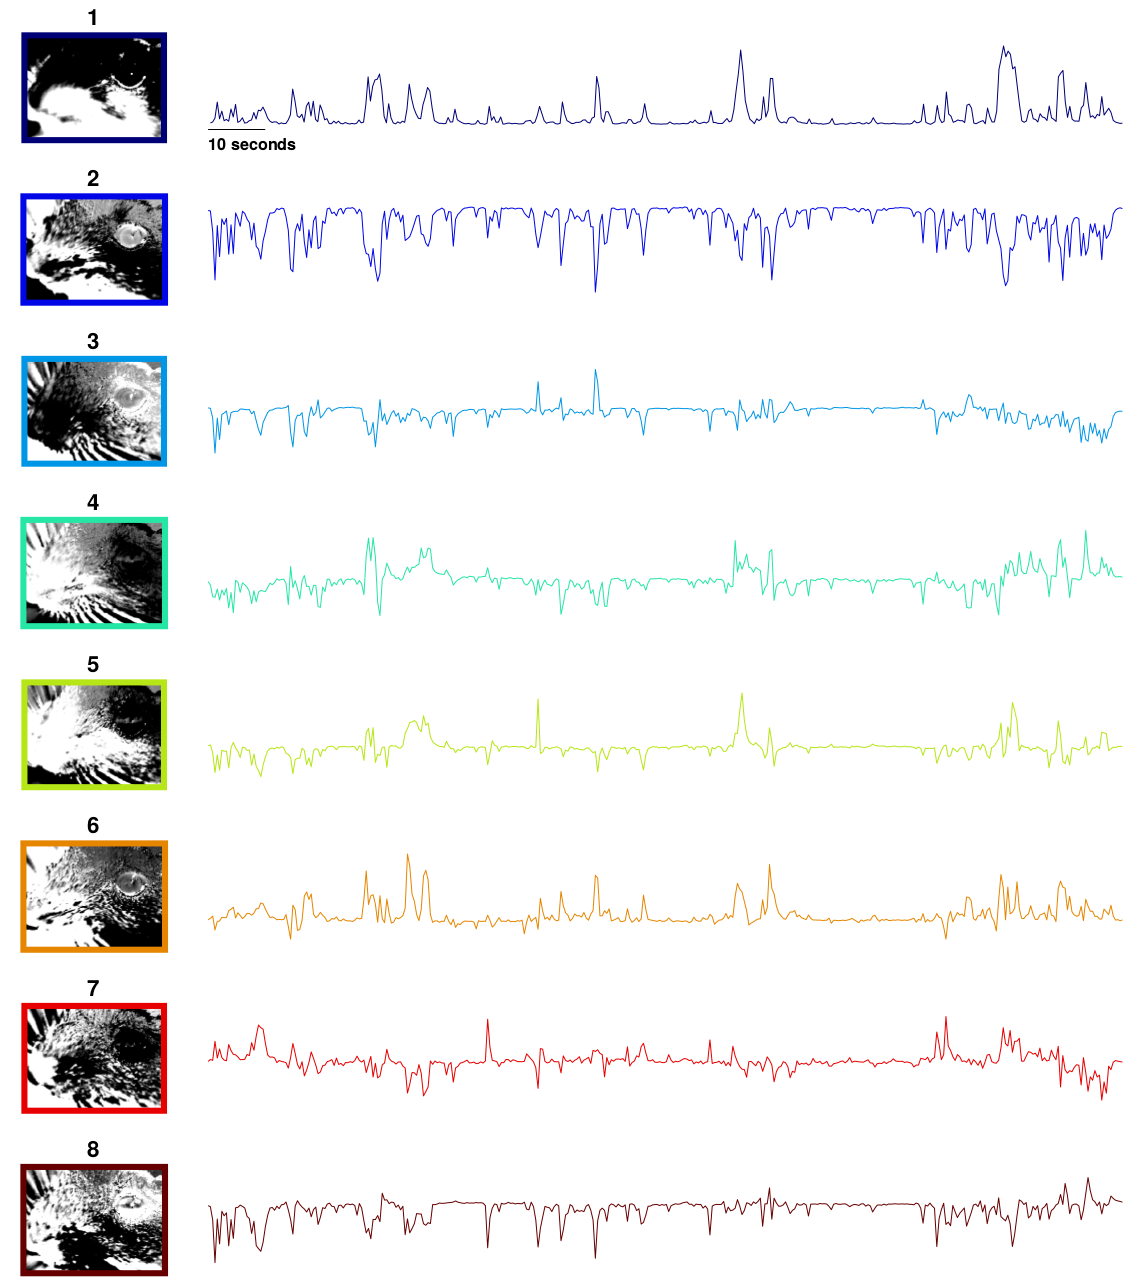
The motion M is defined as the abs(current_frame - previous_frame), and the average motion energy across frames is computed using a subset of frames (avgmot) (at least 1000 frames). Then the singular vectors of the motion energy are computed on chunks of data, also from a subset of frames (15 chunks of 1000 frames each): uMotMask. These are the motion masks that are then projected onto the video at all timepoints (done in chunks of size nt=500):
Example motion masks uMotMask and traces motSVD:
The SVDs can be computed on the motion or on the raw movie, please check the corresponding box for “motion SVD” and/or “movie SVD” before hitting process to compute one or both of these.
We found that these extracted singular vectors explained up to half of the total explainable variance in neural activity in visual cortex and in other forebrain areas. See our paper for more details.
We also compute the average of M across all pixels in each motion ROI and that is returned as the motion. The first motion field is non-empty if “multivideo SVD” is on, and in that case it is the average motion energy across all pixels in all views.
Pupil computation
The minimum pixel value is subtracted from the ROI. Use the saturation bar to reduce the background of the eye. The algorithm zeros out any pixels less than the saturation level (I recommend a very low value - so most pixels are white in the GUI).
Next it finds the pixel with the largest magnitude. It draws a box around that area (1/2 the size of the ROI) and then finds the center-of-mass of that region. It then centers the box on that area. It fits a multivariate gaussian to the pixels in the box using maximum likelihood (see pupil.py).
After a Gaussian is fit, it zeros out pixels whose squared distance from the center (normalized by the standard deviation of the Gaussian fit) is greater than 2 * sigma^2 where sigma is set by the user in the GUI (default sigma = 2.5). It now performs the fit again with these points erased, and repeats this process 4 more times. The pupil is then defined as an ellipse sigma standard deviations away from the center-of-mass of the gaussian. This is plotted with ‘+’ around the ellipse and with one ‘+’ at the center.
If there are reflections on the mouse’s eye, then you can draw ellipses to account for this “corneal reflection” (plotted in black). You can add as many of these per pupil ROI as needed. The algorithm fills in these areas of the image with the predicted values, which allows for smooth transitions between big and small pupils.
This raw pupil area trace is post-processed. The trace is median filtered with a window of 30 timeframes. At each timepoint, the difference between the raw trace and the median filtered trace is computed. If the difference at a given point exceeds half the standard deviation of the raw trace, then the raw value is replaced by the median filtered value.

Blink computation
You may want to ignore frames in which the animal is blinking if you are looking at pupil size. The blink area is defined the number of pixels above the saturation level that you set (all non-white pixels).
Running computation
The phase-correlation between consecutive frames (in running ROI) are computed in the fourier domain (see running.py). The XY position of maximal correlation gives the amount of shift between the two consecutive frames. Depending on how fast the movement is frame-to-frame you may want at least a 50x50 pixel ROI to compute this.